Adding Members To A Collaboration
How To Add Members To A Collaboration
Members can be added to a collaboration while you are creating the collaboration, or at any time after. See Creating A Collaboration for instructions on adding members during collaboration creation.
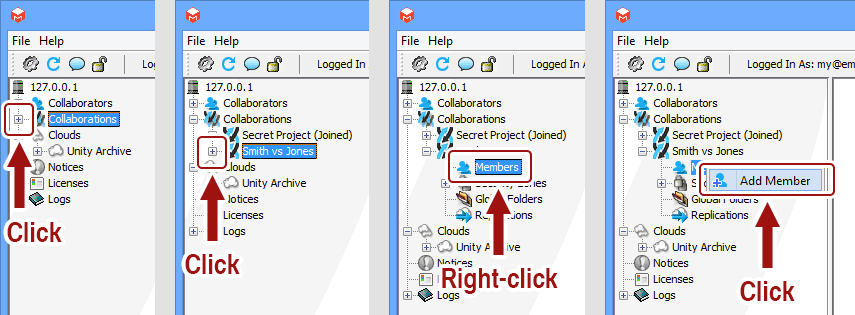
To add members to an already-existing collaboration, bring up the the Unity interface (see Displaying The Unity Interface). Then expand the "Collaborations" node, expand your collaboration node, right-click on the "Members" node, and click "Add Member".
I do not have an "Add Member" option. Why?
You must be a collaboration administrator add collaboration members. If you are missing this option, ask your administrator to give you administrator privilege for the collaboration.
Fill out the form, and click "Add" to add the collaboration to the system.
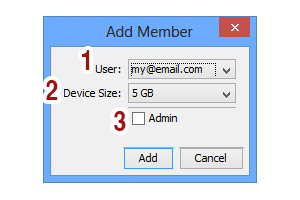
- User: The collaborator to add to the collaboration.
- Device Size: The size of the devices the system will create for this collaborator. The collaborator will have a primary volume of this size on their own system. All other collaborators will have one slave volume of this size on their system which will contain this collaborator's contributions.
- Admin: Check to make this member a collaboration administrator.
What is a collaboration administrator?
A collaboration administrator is a collaboration member with permission to perform the following actions:- Add and change other members.
- Add and change global folders.
- Add and change security zones.
- Add and change security zone members.