Changing Security Zones
Changing Security Zones
If you are designated as a collaboration administrator, you may change some details about security zones.
To add a security zone to a collaboration, bring up the the Unity interface (see Displaying The Unity Interface). Then expand the "Collaborations" node, expand your collaboration node, right-click on the "Security Zones" node to bring up the security zone context menu, and click "Add Security Zone".
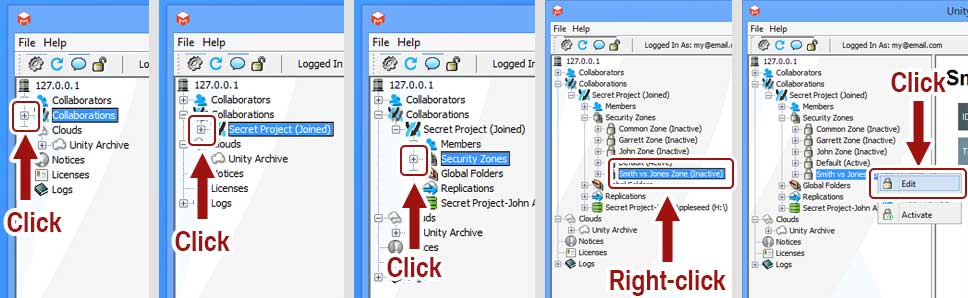
I do not have an "Edit" option. Why?
You must be a collaboration administrator change security zones. If you are missing this option, ask your administrator to give you administrator privilege for the collaboration.
Fill out the form, and click "Update" to commit the security zone changes to the system.
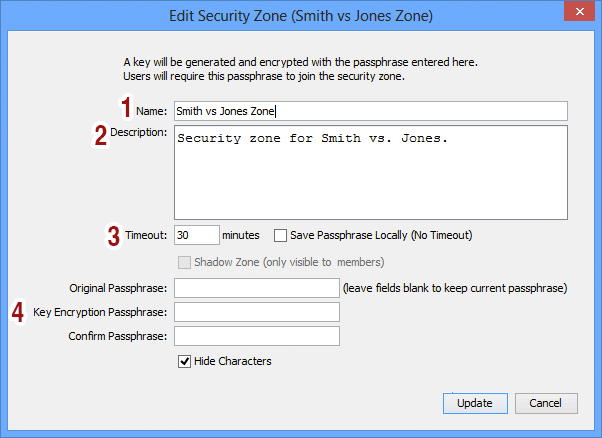
- Name: The name of the security zone.
- Description: A short description of the security zone.
- Timeout: If "Save Passphrase Locally" is checked, then the security zone will not automatically deactivate after a specified period of time. Otherwise, specify the timeout period here, and whenever the security zone becomes active, it will automatically deactivate after the period has elapsed.
- Change Passphrase: To leave the passphrase unchanged, leave these fields blank. To change the passphrase, enter the original passphrase, then the new passphrase, then confirm the new passphrase.